First
Go to control panel – network and internet – network connections.
Right click on the NIC card in question – properties – IPV4 – properties – .advanced – add
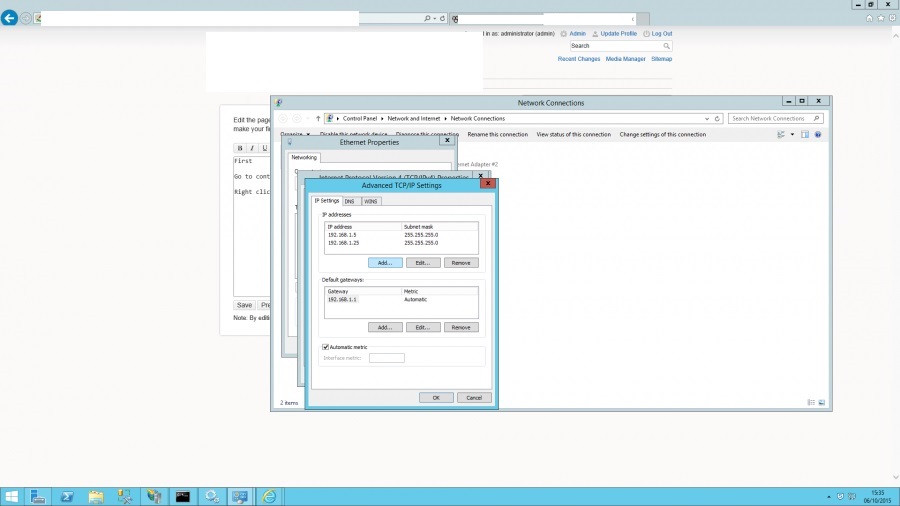
You will see from the image above I have added in a .25 on to this server….
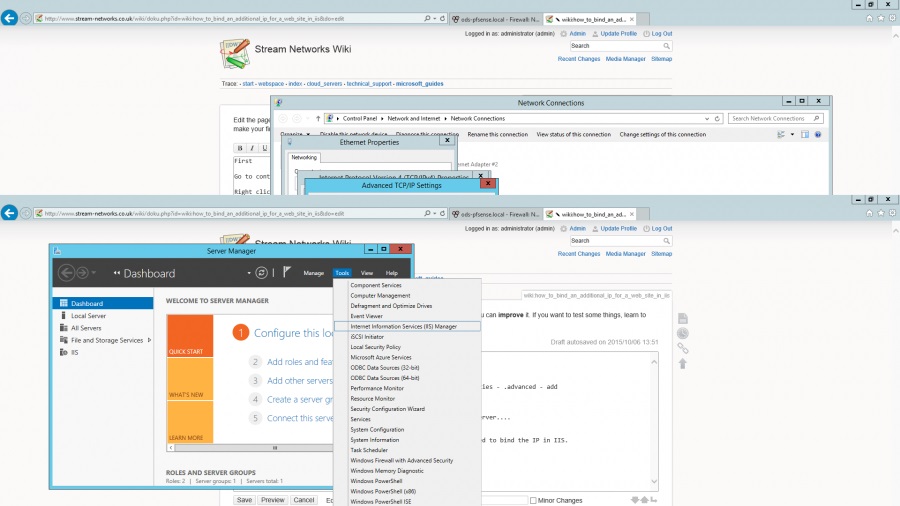
Once you have added the additional IP on to the NIC card you then need to bind the IP in IIS.
Go to server manager – tools – Internet Information Services (Manager)
Once in IIS click on the server – then sites – and browse to the site in question – in the example below it is test.co.uk then right click on the site and “edit bindings”

Then once you are in the bindings hit edit and you will be given a port number along with a list of IP addresses available (it will take this from the IP(s) you have added to the NIC… Pick the IP and click apply – bingo…

Now you will just need to add another WAN IP to your firewall and NAT it through.